Table of Contents
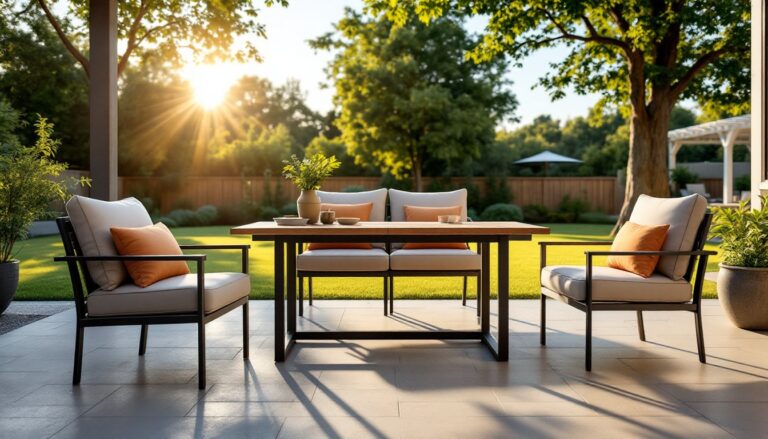
ToggleMetal patio furniture sits outside year-round, exposed to sun, rain, and temperature swings. Over time, the finish fades, chips, or rusts, leaving your seating looking tired and neglected. The good news: a fresh coat of paint can completely revive worn metal pieces and cost far less than replacement. With spray paint designed for metal, basic prep work, and a few hours on a dry day, homeowners can transform their outdoor furniture and refresh their patio’s entire look. This guide walks through assessing your pieces, preparing surfaces properly, and executing a professional-looking finish that lasts.
Key Takeaways
- Painted metal patio furniture protects against rust and corrosion while costing far less than replacement, making it an ideal budget-friendly furniture makeover option for refreshing your outdoor space.
- Proper preparation is essential: inspect for structural damage, remove loose rust and flaking paint with a wire brush, clean thoroughly, and sand with 80–120-grit sandpaper to ensure paint adhesion.
- Use metal-specific primer with rust inhibitors and exterior-grade enamel or polyurethane paint in at least two thin coats, applied 8–10 inches away with overlapping passes to avoid drips and ensure lasting coverage.
- Light sanding between coats with 220-grit sandpaper and a final inspection for missed spots or drips creates a professional-looking finish that lasts several years and completely transforms your patio’s appearance.
- Always wear safety gear including a respirator mask (N95 minimum), nitrile gloves, and eye protection when spray painting, as volatile organic compounds (VOCs) in paint fumes pose real health hazards.
Why Paint Your Metal Patio Furniture
Painted metal patio furniture offers both practical and aesthetic benefits. A new finish protects the underlying metal from rust and further corrosion, especially important in humid or coastal climates where oxidation accelerates. Paint seals the surface, blocking moisture that would otherwise cause deterioration from inside out.
Beyond durability, repainting lets you refresh your outdoor décor without the cost of new furniture. A color change from faded white to charcoal, sage, or bronze completely shifts your patio’s personality and ties it to current landscape design trends. Existing metal frames are structurally sound, the only issue is cosmetic. Projects like these are why many homeowners turn to DIY home decor projects and furniture makeovers for budget-friendly inspiration.
Painting is also faster than replacement. You’re not waiting for delivery, assembling new pieces, or hauling old furniture to the curb. A single afternoon of work extends the life of chairs, tables, and loungers by several years.
Assessing Your Furniture and Preparation Steps
Evaluating Rust and Damage
Before committing to paint, inspect each piece for structural problems. Surface rust, that orange-brown oxidation on the top layer, is cosmetic and easily handled with sanding or a wire brush. Deep rust that has created pits, holes, or flaking metal chunks signals underlying corrosion that paint alone won’t stop. If rust has eaten through metal or weakened joints, the piece may not be worth restoring: replacement is safer and more economical.
Check welds and seams for cracks. Look at leg joints, armrest attachments, and anywhere two pieces connect. Cracked welds are structural failures and require professional repair or replacement. Bent frames or cracked glass table tops also fall outside the scope of a paint project, these require fabrication work.
Cleaning and Sanding Your Pieces
Once you’ve confirmed the furniture is structurally sound, cleaning comes first. Use a stiff brush or wire wheel attachment on a drill to remove loose rust, flaking paint, and dirt. Work outdoors or in a well-ventilated garage: rust dust is unpleasant to breathe.
Next, wash the entire piece with warm soapy water and a scrub brush. This removes grime, pollen, and any residual dust from wire brushing. Rinse thoroughly and allow 24 hours to dry completely: even damp surfaces cause paint adhesion problems.
Sand the surface next using 120-grit sandpaper for light oxidation or 80-grit for heavier rust. Sanding creates a slightly rough texture that helps primer and paint grip the metal. Go over all visible surfaces, edges, and crevices. Pay special attention to areas where old paint is peeling or where rust remains. A palm sander or orbital sander speeds this up on flat surfaces: hand-sand curves, corners, and tight spots.
After sanding, vacuum or brush off all dust. Wipe the entire surface with a tack cloth or damp rag to capture fine particles. This step is critical, paint doesn’t adhere well over dust or debris. Allow the piece to dry completely before moving to the next phase.
Materials and Tools You’ll Need
Materials:
• Primer formulated for metal (oil-based or rust-converting primer works best: spray cans or brush-on options available)
• Exterior spray paint rated for metal (enamel or polyurethane: choose gloss, semi-gloss, or flat based on preference)
• Drop cloths or kraft paper to protect ground and nearby plants
• Painter’s tape for protecting glass, cushions, or areas you don’t want painted
• Mineral spirits or paint thinner (if using oil-based products: follow product instructions)
• Rags for cleanup
Tools:
• Wire brush or wire wheel drill attachment
• 80- to 120-grit sandpaper (sheets and/or sanding sponges)
• Stiff-bristled brush for cleaning
• Palm sander or orbital sander (optional but helpful)
• Tack cloth
• Spray gun or spray cans (spray guns offer better coverage and fewer drips: spray cans are convenient for small pieces or touch-ups)
• Safety gear: nitrile gloves, safety glasses, respirator mask (N95 minimum, though P100 is better for paint fumes)
Why these choices matter: Primer designed for metal includes rust inhibitors or converts rust chemically, stopping oxidation. Generic primer doesn’t. Exterior enamel or polyurethane withstands UV and moisture far better than interior paint. A respirator mask is non-negotiable when spray painting, volatile organic compounds (VOCs) in paint fumes are harmful to inhale, even outdoors.
The Painting Process: Step-by-Step Instructions
Priming and Base Coats
Step 1: Set up your workspace. Choose a dry, calm day, wind carries overspray and dust onto wet paint. Lay drop cloths around the furniture, protecting the ground and any plants or structures nearby. Ensure adequate ventilation if working in a garage or covered space. A fan pulling fresh air across the workspace helps with fume dispersal and drying.
Step 2: Apply primer. Using a spray can or spray gun, apply a thin, even coat of metal primer. Hold the can 8–10 inches from the surface, moving in smooth, overlapping passes. Avoid heavy coats that drip or sag. Light, even coverage is better than thick application. If using oil-based primer, follow drying time (typically 1–2 hours: check the label). Spray primers dry faster than brush-on versions.
Step 3: Sand between coats (optional but recommended). Once the primer is dry, a light sanding with 220-grit sandpaper smooths the surface and helps the next coat adhere better. Wipe away dust with a tack cloth. This step prevents a rough or bumpy final finish.
Step 4: Apply the first coat of paint. Using the same spray technique as priming, apply the first coat of exterior paint. Again, light, even passes prevent drips and runs. Let this dry per the product label, usually 2–4 hours for spray paint, longer for brush-on enamel.
Step 5: Apply the second coat. A second coat ensures even color coverage and better durability. Spray or brush on a second thin coat, maintaining the same technique. Most exterior paints require two coats for lasting color and protection. Some premium formulas claim single-coat coverage, but two coats are safer for outdoor metal.
Step 6: Inspect and touch up. Once fully cured (24–48 hours, depending on product), look for missed spots, thin areas, or drips. A small foam brush and leftover paint allow quick touch-ups. Drips can be sanded smooth if they’ve hardened.
Pro tip: Spray painting outdoors on calm days yields the best results. Many homeowners find inspiration for color and technique in budget home renovation stories, which often feature patio makeovers with painted metal pieces. Store paint cans upside down for 30 seconds after use to seal the valve and extend shelf life for future touch-ups.
Safety reminders: Wear your respirator, gloves, and eye protection throughout the process. Don’t eat, drink, or smoke near paint or solvents. If you feel lightheaded or dizzy, stop immediately and move to fresh air. Paint fumes are real hazards, not just inconveniences.