Table of Contents
ToggleStripping furniture might sound like a wild night out, but it’s really about giving those tired pieces a fresh lease on life. Whether it’s your grandma’s old rocking chair or a thrift store find that’s seen better days, the process can be both satisfying and surprisingly fun. Just think of it as a makeover for your furniture—one that doesn’t require a reality TV crew!
Overview of Stripping Furniture
Stripping furniture involves removing old finishes, paint, or stains to reveal the original material beneath. The process restores the piece’s beauty, enhancing its aesthetic appeal and extending its life. Individuals often choose this method to revitalize antiques or other furniture items that show signs of aging.
Various techniques exist for stripping furniture, including chemical strippers, heat guns, and sandpaper. Chemical strippers efficiently dissolve finishes and provide a thorough clean. Heat guns soften the finish, allowing it to be scraped away more easily. Sandpaper caters to those who prefer a more hands-on approach, though it may require more effort and time.
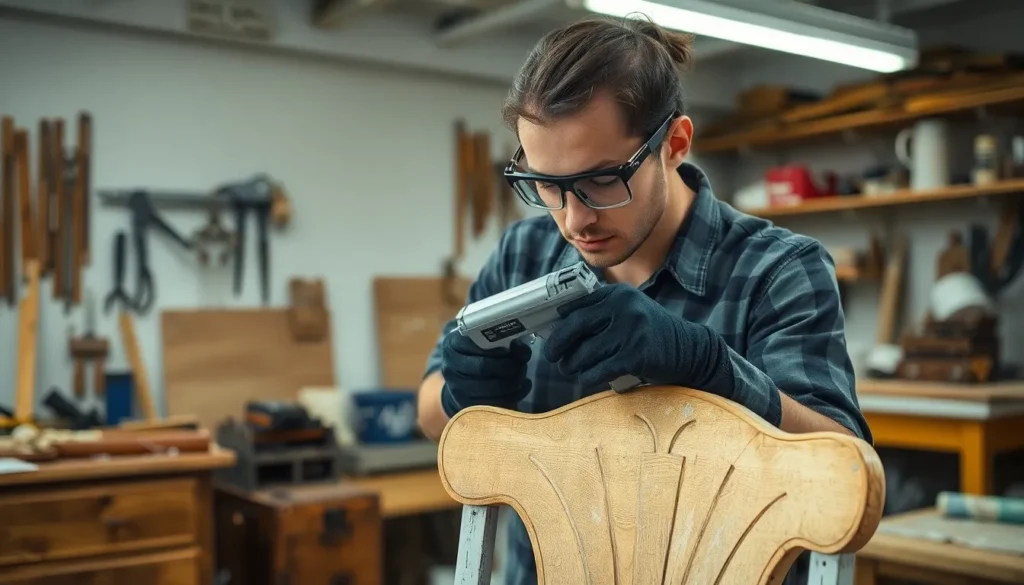
Tools necessary for the job include protective gloves, goggles, and a well-ventilated workspace. Safety precautions ensure that the individual remains safe while handling potentially harmful materials. Surfaces require proper preparation, making the work area tidy and free of clutter.
Heirlooms or thrift store finds often represent the most satisfying projects. Stripping a worn piece of furniture can unearth hidden charm within the grain while creating a personalized look. Many finish types follow different stripping methods, so understanding the material is crucial for effective restoration.
After stripping, refinishing options abound, including staining or applying a clear coat. Each choice can dramatically change the appearance and feel of the restored piece. A DIY approach not only saves costs but also offers a sense of accomplishment in transforming furniture. Engaging in this process can create unique pieces that reflect individual style and creativity.
Tools and Materials Needed
Effective furniture stripping requires a few key tools and materials. These help streamline the process and improve safety while transforming old pieces into stunning treasures.
Manual Stripping Tools
Manual stripping tools include scrapers, paint brushes, and sanding blocks. Scrapers come in various shapes and sizes, allowing for precise removal of finishes. Paint brushes aid in applying finishes or strippers evenly. Sanding blocks provide smooth surfaces by eliminating rough or uneven areas. Consider using different grits of sandpaper for achieving optimal results. The combination of these tools makes the manual process more efficient, ensuring a clean restoration.
Chemical Strippers
Chemical strippers simplify the stripping process by breaking down paint and finishes quickly. Common options include liquid strippers, paste strippers, and gel formulations. Liquid strippers often work best on vertical surfaces, while gel strippers cling better to flat surfaces. Always select a product compatible with the specific finish of the furniture. When using chemical strippers, ensure a well-ventilated area and wear protective gear to minimize exposure. These strippers allow for effective removal, preserving the underlying wood grain.
Step-by-Step Guide to Stripping Furniture
Stripping furniture revitalizes pieces, revealing their original beauty. Following a systematic approach ensures an efficient and successful restoration.
Preparing the Workspace
Setting up the workspace effectively guarantees safety and ease during the stripping process. Choose a well-ventilated area for fresh air circulation, which minimizes exposure to potentially harmful fumes. Lay down a drop cloth to protect the floor from spills. Gather essential tools like scrapers, brushes, and chemical strippers within arm’s reach. Always put on protective gear, including gloves and goggles, to safeguard against chemicals and debris. Having everything organized not only speeds up the process but also enhances the overall experience.
Removing Old Finish
Clearing the old finish requires careful application of the chosen methods. Apply a chemical stripper generously using a paintbrush for even coverage. Allow the stripper to sit for the recommended time, often around 15 to 30 minutes, to effectively break down the finish. Use a scraper to gently lift the softened material, working in the direction of the grain to avoid damage. For stubborn areas, repeat the application if necessary. Sandpaper can also assist in smoothing surfaces after the majority of old finishes are removed. This meticulous approach uncovers the underlying material, setting the stage for a beautiful restoration.
Cleaning and Sanding
Cleaning furniture before sanding is essential. Start by removing dust and debris. Use a damp cloth to wipe surfaces thoroughly. Allow the piece to dry completely to ensure optimal sanding results.
Next, choose the appropriate sandpaper grit. Coarser grits, such as 60 or 80, help remove stubborn finishes, while finer grits, such as 120 or 220, smooth surfaces for refinishing. Work systematically, starting with the coarse paper and progressing to finer grades for a polished finish.
Sanding should follow the wood grain. Applying light pressure prevents damaging the surface. Check for smoothness regularly. If uneven areas remain, continue sanding until all imperfections are addressed.
After sanding, clean the piece again. Use a vacuum or tack cloth to eliminate all dust particles. Proper cleaning after sanding ensures a better bond when applying stains or finishes.
Using these steps streamlines the cleaning and sanding process. Prioritizing thoroughness at each stage enhances the overall restoration results. Following this meticulous approach leads to stunning, revitalized furniture.
Applying New Finish
Selecting the right finish enhances the beauty of stripped furniture and protects it for years to come. Various options include stains, paints, and clear coatings. Each choice tapers off differently during application.
Stain adds color while allowing the wood’s natural grain to show through. Generally, oil-based stains provide richer hues and better durability, while water-based stains offer easier cleanup. Applying a stain requires a clean brush or cloth to cover the surface evenly.
Paint works well for those wanting a bold look. Various colors are available, allowing for creativity and personality. When opting for paint, using an appropriate primer ensures better adhesion and a smoother finish, especially on previously finished surfaces.
Clear coats provide a protective layer over stained or painted furniture. Choices include polyurethane, varnish, and shellac. Polyurethane offers excellent durability for high-traffic pieces, while varnish delivers a warmer appearance. Shellac is easy to apply and dries quickly, making it suitable for small projects.
Preparation steps are crucial to achieving a flawless finish. Start by ensuring the surface is completely clean after sanding. Following this, applying a test area allows for adjustments before the final coat.
Timing between applications matters. Allowing proper drying time between coats prevents smudging and uneven surfaces. Using a fine-grit sandpaper prepares each layer for the next, promoting adhesion.
After all coats are applied, assess the furniture for consistency and quality. Sufficient time for curing solidifies the finish, providing lasting beauty. Enjoying transformed furniture brings satisfaction and pride in DIY endeavors.
Tips for Successful Stripping
Tools and materials play a crucial role in the stripping process. Choose chemical strippers that suit the furniture’s finish for optimal results. Selecting manual tools like scrapers and brushes enhances control while removing old finishes. Always prioritize safety by wearing goggles and gloves during the project.
Workspace preparation significantly affects the outcome. A well-ventilated area ensures proper airflow and minimizes exposure to harmful fumes. Lay down a drop cloth to protect the surrounding surfaces from drips and spills. Organizing tools within easy reach streamlines the workflow.
When applying the stripper, consistency matters. A generous, even layer allows the chemical to penetrate effectively. Follow the manufacturer’s instructions regarding dwell time for best results. For tougher spots, reapply the stripper as needed rather than forcing removal.
Sanding techniques should follow the initial stripping. Start with coarse grit sandpaper to eliminate any stubborn residue. Transition to finer grits to create a smooth, even surface for refinishing. Light pressure helps avoid damage to the wood.
Post-stripping cleaning is essential. Carefully wipe down the furniture to remove dust and debris before applying new finishes. Testing the stain or finish in a small area determines compatibility. Timing between coats varies, so allow sufficient drying time to achieve a durable finish.
Ultimately, patience is vital throughout the process. Each step from stripping to finishing contributes to the final appearance. By following these tips, individuals can significantly enhance their furniture restoration efforts, ensuring beautiful, lasting results.
Stripping furniture is a rewarding journey that breathes new life into cherished pieces. It’s a hands-on approach that not only uncovers the beauty hidden beneath layers of old finishes but also allows for personal expression through refinishing choices.
By following the right techniques and using quality tools, anyone can transform tired furniture into stunning focal points. The satisfaction of completing such a project fosters a deeper appreciation for craftsmanship and creativity. Embracing this DIY endeavor can turn an old item into a unique masterpiece that reflects individual style and enhances any space.